
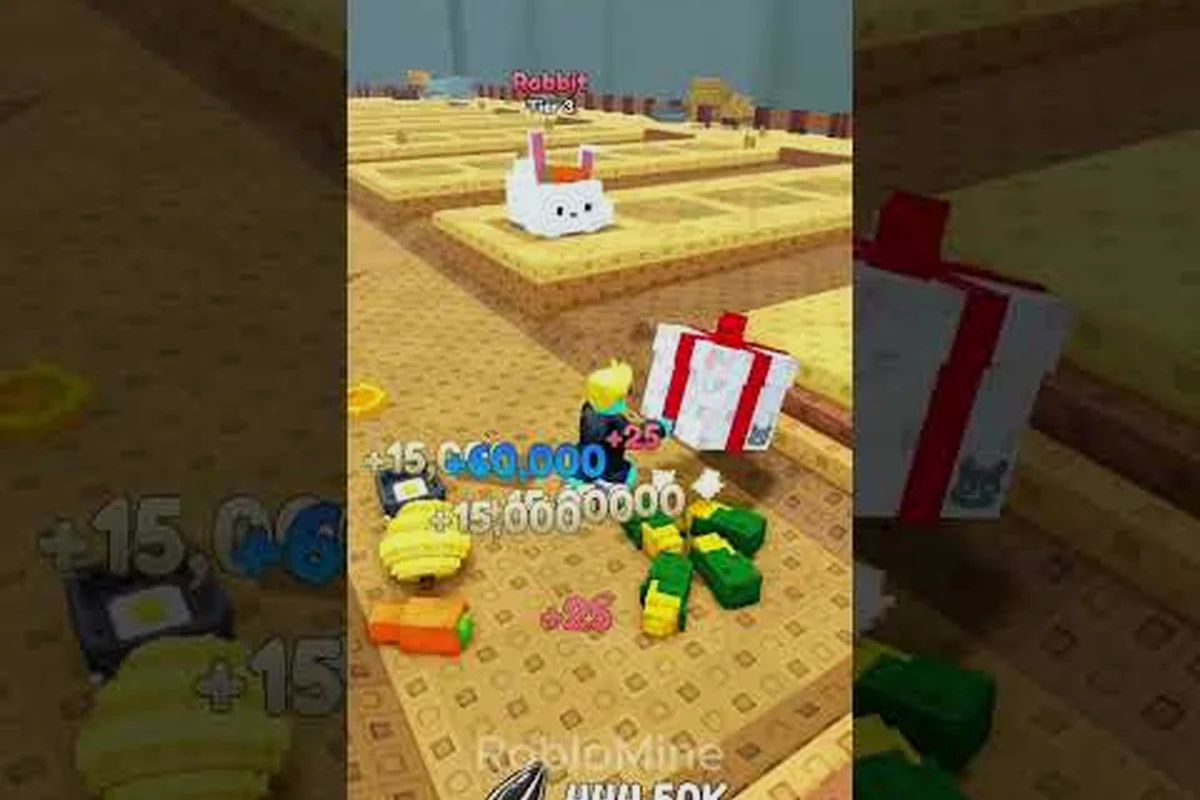
Hamster Village is one of the cleanest merge tycoon loops on Roblox right now, and a focused hamster village walkthrough will save you hours of guessing where the money actually goes. The game launched in mid-August 2026 and has already passed 2.27 million visits, with about 66.8K favorites and a roughly 98% positive like ratio on the official Roblox page, so the loop is clearly working for a large audience. This hamster village tutorial breaks down the seed-to-money engine, the merge tier list, and the early-game decisions that separate a stalled starter base from a hamster army that prints currency while you are away. If you have opened the game, bought one hamster, and wondered "what do I actually do next," the answer is below.
Understanding the Core Hamster Village Gameplay Loop
The entire hamster village gameplay loop rests on three resources: Hamsters, Seeds, and Money. Every other mechanic in the game feeds back into one of these. Hamsters produce Seeds over time, Seeds convert into Money at the deposit pad, and Money buys more Hamsters or triggers merges that turn two matching Hamsters into a single higher-tier pet. That single sentence is the whole game, and most of your decisions as a new player are about which of those three actions to prioritize at any given moment.
The Three-Resource Economy
The economy is deliberately simple. Each Hamster has a hidden production rate that scales with its tier, and the rate jumps noticeably once you cross certain tier thresholds. Lower-tier Hamsters drop Seeds slowly enough that they feel almost decorative, while a fully upgraded lineup can flood the field with Seeds in a matter of minutes. Depositing Seeds to the central pad is the only way to bank Money, and the deposit pad has a soft cap on how long Seeds can sit on the ground before they slow your production rhythm.
| Resource | Source | Sink | Early-Game Priority |
|---|---|---|---|
| Hamsters | Shop, merges | Placed on field | Buy 2 of every cheap tier to enable merges |
| Seeds | Hamster drops | Deposit pad | Collect every 30-60 seconds |
| Money | Seed deposits | Shop, merges | Spend on merges before cosmetics |
The single biggest mistake new players make is letting Seeds pile up on the ground while they wait for a "better" time to deposit. Seeds that sit un-deposited are not producing Money, and Money sitting in the deposit pad is not buying you the next Hamster. The faster your turn rate between drop, collect, and deposit, the more upgrades you can afford per minute.
Why Merge Tycoons Click So Quickly
Merge tycoons work because every action has a visible next step. You buy a Hamster, you see Seeds appear, you see the deposit counter tick up, and you see a new Hamster icon unlock in the shop. That tight feedback loop is the same reason games like this retain players, and it is also why a small efficiency gain early on compounds into a massive lead two hours later. The hamster village walkthrough is essentially a list of where those efficiency gains live.
Reading the Merge Tier System
Merges are the single most important mechanic in any hamster village guide because they are the only way to escape the early-game production wall. Two Hamsters of the same tier combine into a single Hamster of the next tier, and the new Hamster drops Seeds at a substantially faster rate than the pair did separately. That is the entire incentive structure: combine to multiply output.
Tier Behavior and Production Scaling
Each Hamster tier in the village has a different visual, a different name, and a different Seed drop rate. While the exact drop numbers shift with each update, the design pattern is consistent across the chain. Lower tiers are cheap and slow, mid tiers are where the real production ramp begins, and the top tiers act as long-term goals that give the loop its late-game identity.
| Tier Range | Cost Bracket | Seed Output Feel | Merge Priority |
|---|---|---|---|
| Tier 1-3 | Cheap (under 100 Money) | Slow trickle | Buy two of each to unlock merge path |
| Tier 4-6 | Mid (hundreds of Money) | Steady drops | Focus merges here for first real ramp |
| Tier 7-10 | Expensive (thousands+) | Fast production | Merge when pairs are stable, not before |
| Tier 11+ | Endgame | Top-tier output | Long-term goal, chase after mid-game stable |
A useful rule of thumb is to always keep at least one mergeable pair on the field for the tier you are currently working on, and to avoid spending Money on a new Hamster until you have enough saved to buy two. Buying singles stalls your merge progress and leaves you with a wide but shallow roster that produces poorly.
Visual Cues and Roster Tracking
The game gives you a roster screen that shows every Hamster you have ever unlocked, along with how many copies of each tier you currently own. Use that screen like a checklist. If you see a tier you have not yet unlocked, that is your next merge target. If you see a tier where you own zero copies, that is your next shop target. The roster is a much better planning tool than guessing, and it costs nothing to open. For a deeper breakdown of the merge math, the Hamster Village merge guide walks through the same tier structure with extra focus on merge timing.
First-Hour Strategy: How to Start Hamster Village
The first hour of hamster village gameplay is where most players either build momentum or fall into a slow grind. The good news is that the early game is forgiving, and a tight loop of "buy pair, merge, deposit, repeat" will carry you through the first three or four tier breakpoints without any fancy optimization. The bad news is that the loop is repetitive by design, and players who try to skip the deposit step lose more time than they save.
The Buy-Two, Merge-One Pattern
Your default action for the first 15-20 minutes should be simple. Open the shop, buy the cheapest Hamster available, wait until you can afford a second copy of that same Hamster, merge them, and use the resulting upgrade to either buy a new pair at a higher tier or to start saving for the next tier up. Repeat this pattern until your roster has at least one Hamster at every tier up to your current ceiling.
| Minute | Action | Goal |
|---|---|---|
| 0-5 | Buy cheapest Hamster, collect Seeds, deposit | Get the loop running |
| 5-15 | Save for second copy, merge into Tier 2 | Unlock first upgrade |
| 15-30 | Buy pairs at Tier 1-2, push merges to Tier 3 | Establish merge rhythm |
| 30-60 | Aim for first Tier 4-5 Hamster | Cross the mid-game threshold |
A common first-hour trap is buying a single copy of every tier instead of two copies of a single tier. The shop tempts you with shiny new icons, but a single Tier 4 Hamster produces less than a stable pair of Tier 3s that you can merge, and a merged Tier 4 produces far more than the sum of its parts. Resist the urge to spread your Money sideways until you have at least one strong vertical line of merged Hamsters.
Upgrade Timing vs. Saving for a Merge
Money in the deposit pad has two competing uses: buying more Hamsters to expand your roster, and saving up to merge your current Hamsters into a higher tier. Both are valid, but the right answer depends on what tier you are currently sitting on. If you are at Tier 2 and your next merge would push you to Tier 3, spend. If you are at Tier 5 and your next merge is a long save away, invest the spare Money in extra Tier 1-2 pairs so you have a constant supply of merge fodder in the background.
Mid-Game Progression: Building a Stable Production Base
Once you have crossed the first three or four tier breakpoints, hamster village gameplay shifts from a survival sprint to a real economy. The deposit pad is filling up faster than you can spend, the shop is offering more expensive Hamsters every few minutes, and the question becomes how to allocate that growing Money stream for maximum long-term output.
Spreading the Field for Idle Production
Mid-game players should start placing Hamsters in a wider field layout instead of clustering them near the deposit pad. Spread Hamsters out so their Seeds do not overlap, and you will collect them more efficiently on each loop. A simple grid of two-to-three rows works well, and leaving a clear path to the deposit pad avoids the awkward situation where a wall of Hamsters blocks your run.
| Field Layout | Pros | Cons |
|---|---|---|
| Tight cluster | Easy to reach, fast collection | Seeds overlap, slow turn rate |
| Two-row grid | Balanced coverage, clear paths | Slightly more running |
| Three-row grid | Maximum spread, best for idle | More running, need more Hamsters to fill |
| Single long row | Easy deposits | Wastes Hamster density |
The three-row grid is the long-term goal for most players, but the two-row grid is a perfectly fine mid-game stopping point. Do not overthink the layout, because the difference between a great field and a decent field is maybe 10-15% efficiency, while the difference between a merged Tier 6 base and an unmerged Tier 4 base is several times the output.
Roster Diversity and Unlock Goals
The game rewards you for unlocking every Hamster in the collection, and unlocking the rarer tiers usually requires specific merge paths rather than raw spending. The roster screen is the best place to plan this. Look for tiers where the icon is greyed out, identify which two lower tiers you need to combine, and target those merges specifically. This is where the hamster village guide for 2026 differs from older merge tycoons, because the developer ships updates frequently and the tier list shifts between patches. If you want a broader view of how the loop works as a whole, the Hamster Village game guide covers the wider gameplay picture, and the official Hamster Village page on Roblox is the most reliable place to confirm current patch details.
Five Traps That Stall a New Tycoon Run
Even experienced Roblox players fall into the same handful of traps when they start a new merge tycoon. The good news is that every one of these mistakes has a simple fix, and recognizing the pattern early is the difference between a smooth first session and a frustrating grind.
Mistake 1: Letting Seeds Pile Up Uncollected
Seeds on the ground are Seeds you have not deposited, and un-deposited Seeds are not Money. The fix is mechanical: collect every 30-60 seconds, deposit immediately, and only stop the loop if you are actively buying something from the shop. Players who "save up" Seeds on the ground are paying an invisible tax in lost production.
Mistake 2: Buying Singles Instead of Pairs
A single new Hamster is half as useful as a mergeable pair, because half of that pair is the merge target you need anyway. Whenever the shop tempts you with a new tier, ask yourself whether you can afford two copies. If yes, buy two. If you can only afford one, save until you can afford the pair. Singles are a stall, not a step forward.
Mistake 3: Ignoring the Roster Screen
The roster screen is free information, and most players open it only when they have nothing else to do. The fix is to check the roster every 5-10 minutes and use it as a planning tool. Identify the next greyed-out icon, work backward to the merge that unlocks it, and spend your Money on that specific path instead of impulse buying the shiniest new shop Hamster.
Mistake 4: Trying to Unlock Every Tier at Once
Spreading Money across every tier in the shop feels productive, but it produces a wide but shallow roster that cannot push past the mid-game production wall. Pick a single vertical line of merges and push it as high as you can, then start a second vertical line once the first one is stable. Two strong lines beat ten scattered singles every time.
Mistake 5: Forgetting the Server Is the Update Window
Hamster Village uses server shutdowns as update triggers, which means the game will disconnect you and bump you to a new server whenever the developer ships a patch. Do not panic when this happens, and do not assume the patch broke your save. Your progress carries over, and the new server often has balance changes that may help or hurt your current strategy. If you want a step-by-step look at how the early hours actually unfold in practice, the Hamster Village starter walkthrough breaks the same progression into checkpoint-sized pieces.
Frequently Asked Questions
How long does it take to reach the mid-game in Hamster Village?
Most players reach the mid-game, defined here as a stable Tier 5-6 Hamster and a three-row field layout, within 45-75 minutes of focused play. Casual players who leave the game running in the background hit the same milestone in roughly two to three hours of accumulated playtime because idle Seed production keeps the loop alive while they are away.
Is there a code redemption system in Hamster Village?
No, the game does not currently have an in-game code redemption system. Progression is driven entirely by Seeds, Money, and merges, so any website claiming to have working codes for the village is either outdated or fabricated. The only legitimate progression boosters are the ones you buy or merge yourself.
Why do my Hamsters keep disappearing after a patch?
The game treats every server shutdown as an update window, which can shift which Hamsters are available in the shop or in your active field. Your roster, Money balance, and unlocked tiers are saved, but the active field may need to be re-populated after a patch because the developer often changes the field layout or starting loadout between updates.
Can I play Hamster Village on mobile and PC with the same progress?
Yes, because progress is tied to your Roblox account rather than to a specific device. You can start a session on mobile during a commute and continue on PC later, and your Seeds, Money, and Hamster roster will all be intact. The merge timing and deposit pad behavior are identical across platforms.
What is the fastest way to unlock new Hamster tiers?
The fastest path is to focus all spending on a single vertical merge line until it is stable, then start a second line in parallel. Trying to unlock every tier at once slows the entire process because your Money gets spread across too many incomplete pairs to push any of them past the merge threshold.